Pages

Wednesday, November 9, 2011

little vintage style v.30


Welcome to Little Vintage Style, a place to show off your sweet little ones wearing vintage! Link up every Wednesday, and make sure to click around and say 'hello!' to all of the other vintage lovin' mamas like you!

**********

Hello! So I guess I am technically cheating on this weeks post, but I thought I would share some of our old family photos (and totally not because I haven't taken any pictures of my kids since Halloween).  This first one is a real gem and one of my favorites. My mother and two oldest sisters in matching handmade stripes/apples outfits. A part of me really wants to reenact this picture with my own two girls, I know my mom would think it was hilarious. I do find myself matching my kids on accident with similar color schemes and styles frequently, how about you?


When I was young we lived in California. That little beach baby is me, and my sister just above me is standing by the stroller. My sister and I are about the same age difference as LM and Lark, and when I look at these pictures I can't help but see them. I was so happy when I found out I was having another girl because I know what having a sister so close in age is like - awesome! I also found a jacket pretty similar to this one that I am looking forward to Lark wearing this Spring.


Here I am at 8 months and 3 years, the same ages LM and Lark are now. I thought it would be fun to make a comparison. I can still remember hating that red calico dress - I did not want to wear it and I'm pretty sure I made that clear in the picture! To this day I very rarely wear red. Some things never change.


And, here is Husband at 1 year and 2 years (the closet ages I could find to the girls). I think LM looks more like him, but Lark looks more like me. What do you think?


Hope you enjoyed a little peek into our past! If you'd like, link up below...


Monday, November 7, 2011

family pictures: four of harts

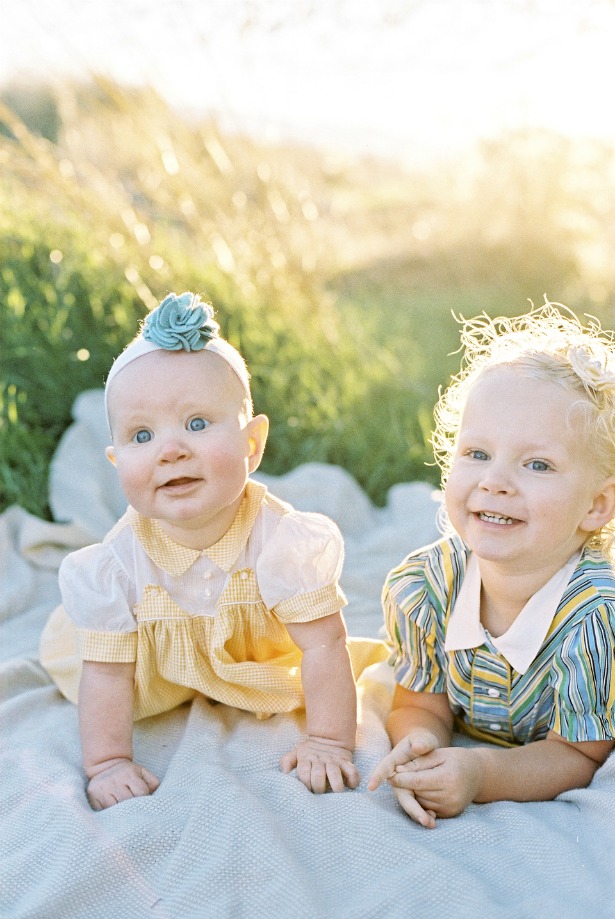
A couple of weeks ago we were lucky to have our family pictures taken by the talented Bri, who if you remember also took our last family of three pictures. I love the moments she captured of our new family of four! She also shoots film which I really admire. The weather was beautiful, the girls were mostly cooperative (LM wouldn't pose by herself), and Bri made us feel comfortable right away. It was hard to pick just a few favorites, so get ready for an onslaught of photos!


All photos by Bri at Collected Photography

In case you are wondering, yes, LM is wearing the same dress as our last photo shoot. I just couldn't find one I liked with the rest of our outfits as well, so there you go! I was glad it was warm enough she didn't have to wear a sweater this time so you can really see it because it's one of my favorites. And, I think she is even wearing the same hair clip which is funny because I grabbed it at the last minute as we were walking out the door.

I love my little family of four. It is amazing how it is already hard for me to remember what it was like with just the three of us - Lark has added so much joy in our lives. Can I tell you that I am already looking forward to adding another baby or two (or three) into the mix? Not now, but soon enough!

Just in case you wondered...
Mama wore: dress, Shabby Apple/ necklace, Target
Papa wore: sweater, Gap/pants, Gap/shoes, Vans
LM wore: dress, vintage/tights, Old Navy/shoes, Old Navy/hair clip, handmade by my sister
Lark wore: dress, vintage/headband, handmade by my sister/tights, hand-me-downs/shoes, gift from lovely friend Vanessa

Wednesday, November 2, 2011

shop update: NEW look!


The etsy shop got its own little makeover to match the blog's new look. Head on over to check it out, along with some pretty new dresses I just listed!

little vintage style v.29


Welcome to Little Vintage Style, a place to show off your sweet little ones wearing vintage! Link up every Wednesday, and make sure to click around and say 'hello!' to all of the other vintage lovin' mamas like you!

**********

If you celebrated Halloween, I hope you had a fun one! At our house we had a pretty sparkly butterfly and a cute fuzzy caterpillar...


LM wore a vintage 50's tap dance costume with matching hair piece I bought off ebay a couple of months ago. It is pretty much her uniform of choice these days - if you ever happen to wonder what she is wearing at any given moment (because why wouldn't you?), there is a very good chance it is this with ballet flats.

I found her butterfly wings at the thrift store, recovered them, and added a bunch of sparkle per her request. I know I could have just bought her new ones, but I want to make at least part of her costume every year if I can. It was tedious work sewing on the sequins, but worth it when she gave me a big hug, and said they were 'boo-tiful' (unintentional Halloween joke, that's really how she says it)


Lark's entire costume was handmade by me last minute that afternoon. Considering my time crunch I am quite proud of how it turned out. If you look closely you can see the little legs down the sides, they kind of got out shown by the fuzzy stripes. I was going to make her a little pink hood, but ran out of time... no procrastinating next year! (not making any promises).


Husband and I didn't end up in costumes and that's okay. Sometimes you just have to not worry about less important things so the more important things, like feeding your family dinner, and trick-or-treating get done. 

LM would only say 'trick or treat!' to the neighbors she recognized, was done after knocking on about 15 doors, and was happy to go to sleep after a candy bedtime snack. Lark chewed on a candy bar (in wrapper). We are calling it a success!


If you'd like, link up below!


Tuesday, November 1, 2011

doll suitcase: tutorial


I created this fun doll suitcase for my oldest daughter and we love playing with it together. It has three interchangeable rooms, a secret clothes storage space under the floor, and it's portable! Would you like to make your own? I'll show you how!


You will need all of the supplies listed above, as well as the notably missing iron, thread, scissors, and sewing machine. The 'wallpaper' fabric, or base fabric, for the rooms needs to be at least a whole fat quarter (depending on the size of your suitcase), but the remaining fabric can be scraps - it's a great way to use up some of your stash.

I made three interchangeable rooms for mine, so I used three pieces of poster board. You may also need a piece of poster board for the 'floor' backing. The foam board just needs to be a big as your suitcase. Speaking of the suitcase, I found this vintage green beauty at the thrift store for $3. The key to this project is the ruffle edging along the inside of the top lid - that ruffle is what will hold your interchangeable rooms in place.


First, measure the inside of the lid and cut out the poster board(s) so it fits snugly behind the ruffle, but you can still pull it out.


Next, take a large piece of freezer paper and trace the outline of the poster board so you know exactly how much space you have to fill. Draw a pattern of your room - know the more detailed it is, the more work it will be! I didn't end up putting all of these little details in my kitchen, but the main components are important at this point.


Cut out all of the main components of your drawing to create freezer paper pattern pieces.


I'll show you the next several steps using my fridge pattern piece, but you will want to do this for all of your pieces.

Now you can decide what color felt or fabric print you want to use for each piece. Iron the freezer paper pattern onto your choice of material, I chose to make my fridge out of blue felt.


This will make it easy to cut out the shape, then simply peel the freezer paper off (you can use the same freezer paper pattern several times if needed - I kept all of mine just in case I want to make another doll suitcase someday for my other daughter, although maybe I would want to make it look different!).


Next take the double stick fusible and place your cut out pattern piece onto it. I don't worry about covering every square inch, that way I can use up scrap pieces of fusible if needed.


Cut out the fusible into your shape and peel off the backing.


Once you have all of your main pieces cut out with the fusible, place them onto a piece of fabric that will act as the 'wallpaper'. A fat quarter was the perfect size for my suitcase, just make sure your piece is big enough to cover the poster board piece you cut out in the first step with a few inches around to spare. Iron all of the main pieces in place, the fusible will adhere them to the fabric.


Add the rest of the details in your room in the same manner and iron them in place. Then sew around everything to secure it and add other details, for example, I sewed the sink outline onto the counter.


Fun details include pictures cut out from printed fabrics. I also used pops of gold and silver fabric for added shine and texture.


Embroider any small details as needed. I used embroidery on my sewing machine in the bedroom, for the cord on my light and the word on the fridge in the kitchen, and for the clock face in the front room.


Once your room is all sewed up and you are satisfied, it's time to glue! Take the poster board you originally cut out and wrap your room tightly around it. Using a hot glue gun, glue it securely in place all the way around. Add a small ribbon pull tab to one corner.


This tab will allow you to easily pull the rooms out of the suitcase lid to change them up. I also ended up adding a ribbon pull tab to the floor which is the next step.

   
For the floor, measure around the lip of the bottom portion of your suitcase and cut out the foam board to fit. Wrap fabric around the foam board and hot glue in place, add a ribbon pull tab (not pictured), and then back it with a piece of poster board. You may be able to use a leftover piece of poster board if you cut using space carefully at the start.


The bottom of the suitcase serves as storage for my daughter's doll and all of her clothes, so the floor will hide this space during playtime.

Pop your room(s) and floor into place and you're done! All three of my rooms fit behind the ruffle at once, so that is how I store them. Just pull the ribbon tabs to get them out and switch them up (tip: in retrospect I should have used a different color ribbon for each room so I would know which tab to pull accordingly).

Here are my finished rooms - the front room, the bedroom, and the kitchen:


For my doll, I used the Black Apple pattern and I had a lot of fun designing an entire wardrobe for her. The sky is the limit with this project, I hope you try it out!



Also, a big thank you to Prudent Baby for sharing this tutorial on their site as well.